ES Replacement System Maintenance
Introduction
The Sound Hole Mount System requires very little maintenance. However, if you do need to make adjustments to the system, this page will give you step-by-step instructions to do so.
Maintenance Procedures
Replacing the Battery
The system has a battery life of approximately 75 hours.
When you see the battery light turn on and stay on, it is time to replace the battery.
Only use high-quality Alkaline, non-rechargeable, 9v batteries.
Remove the battery drawer.
Replace the battery in the drawer.
Replace the battery drawer.
Removing the Preamp
In the event that you need to remove the preamp from its mounting location to make adjustments, follow these steps to ensure that you do not damage any of components.

Remove the guitar strings.
Carefully reach inside and remove the cables from Wire Clips 1 and 2.
Remove the control knobs and mounting nuts.

Carefully pull the knobs away from the side of the guitar.
Use the Collet Nut Tool to loosen and remove each nut.
4. Remove the Preamp
Reach inside the guitar and pull the preamp out.
If required, disconnect the pickup and/or the output cables.
Balancing the Strings
If you still have the preamp balancing holder that came with your system, follow the instructions for Removing the Preamp, and then follow the balancing procedure from the installation instructions starting with Step 3 through the end of the instructions.
If you do not have the string balancing holder, follow the instructions below.
Make a careful note of which strings you want to adjust.
Carefully make the adjustments.
Adjusting the Mid-Contour
If you still have the preamp balancing holder that came with your system, follow the instructions for Removing the Preamp, and then follow the balancing procedure from the installation instructions starting with Step 7 through the end of the instructions.
If you do not have the string balancing holder, follow the instructions below.
Make a careful note of how you want to adjust the mids.
Carefully make the adjustment.
Adjusting the Action
WARNING!!!!
The connectors and cable can be easily damaged during installation.
Make sure you understand the proper handling procedures before continuing.
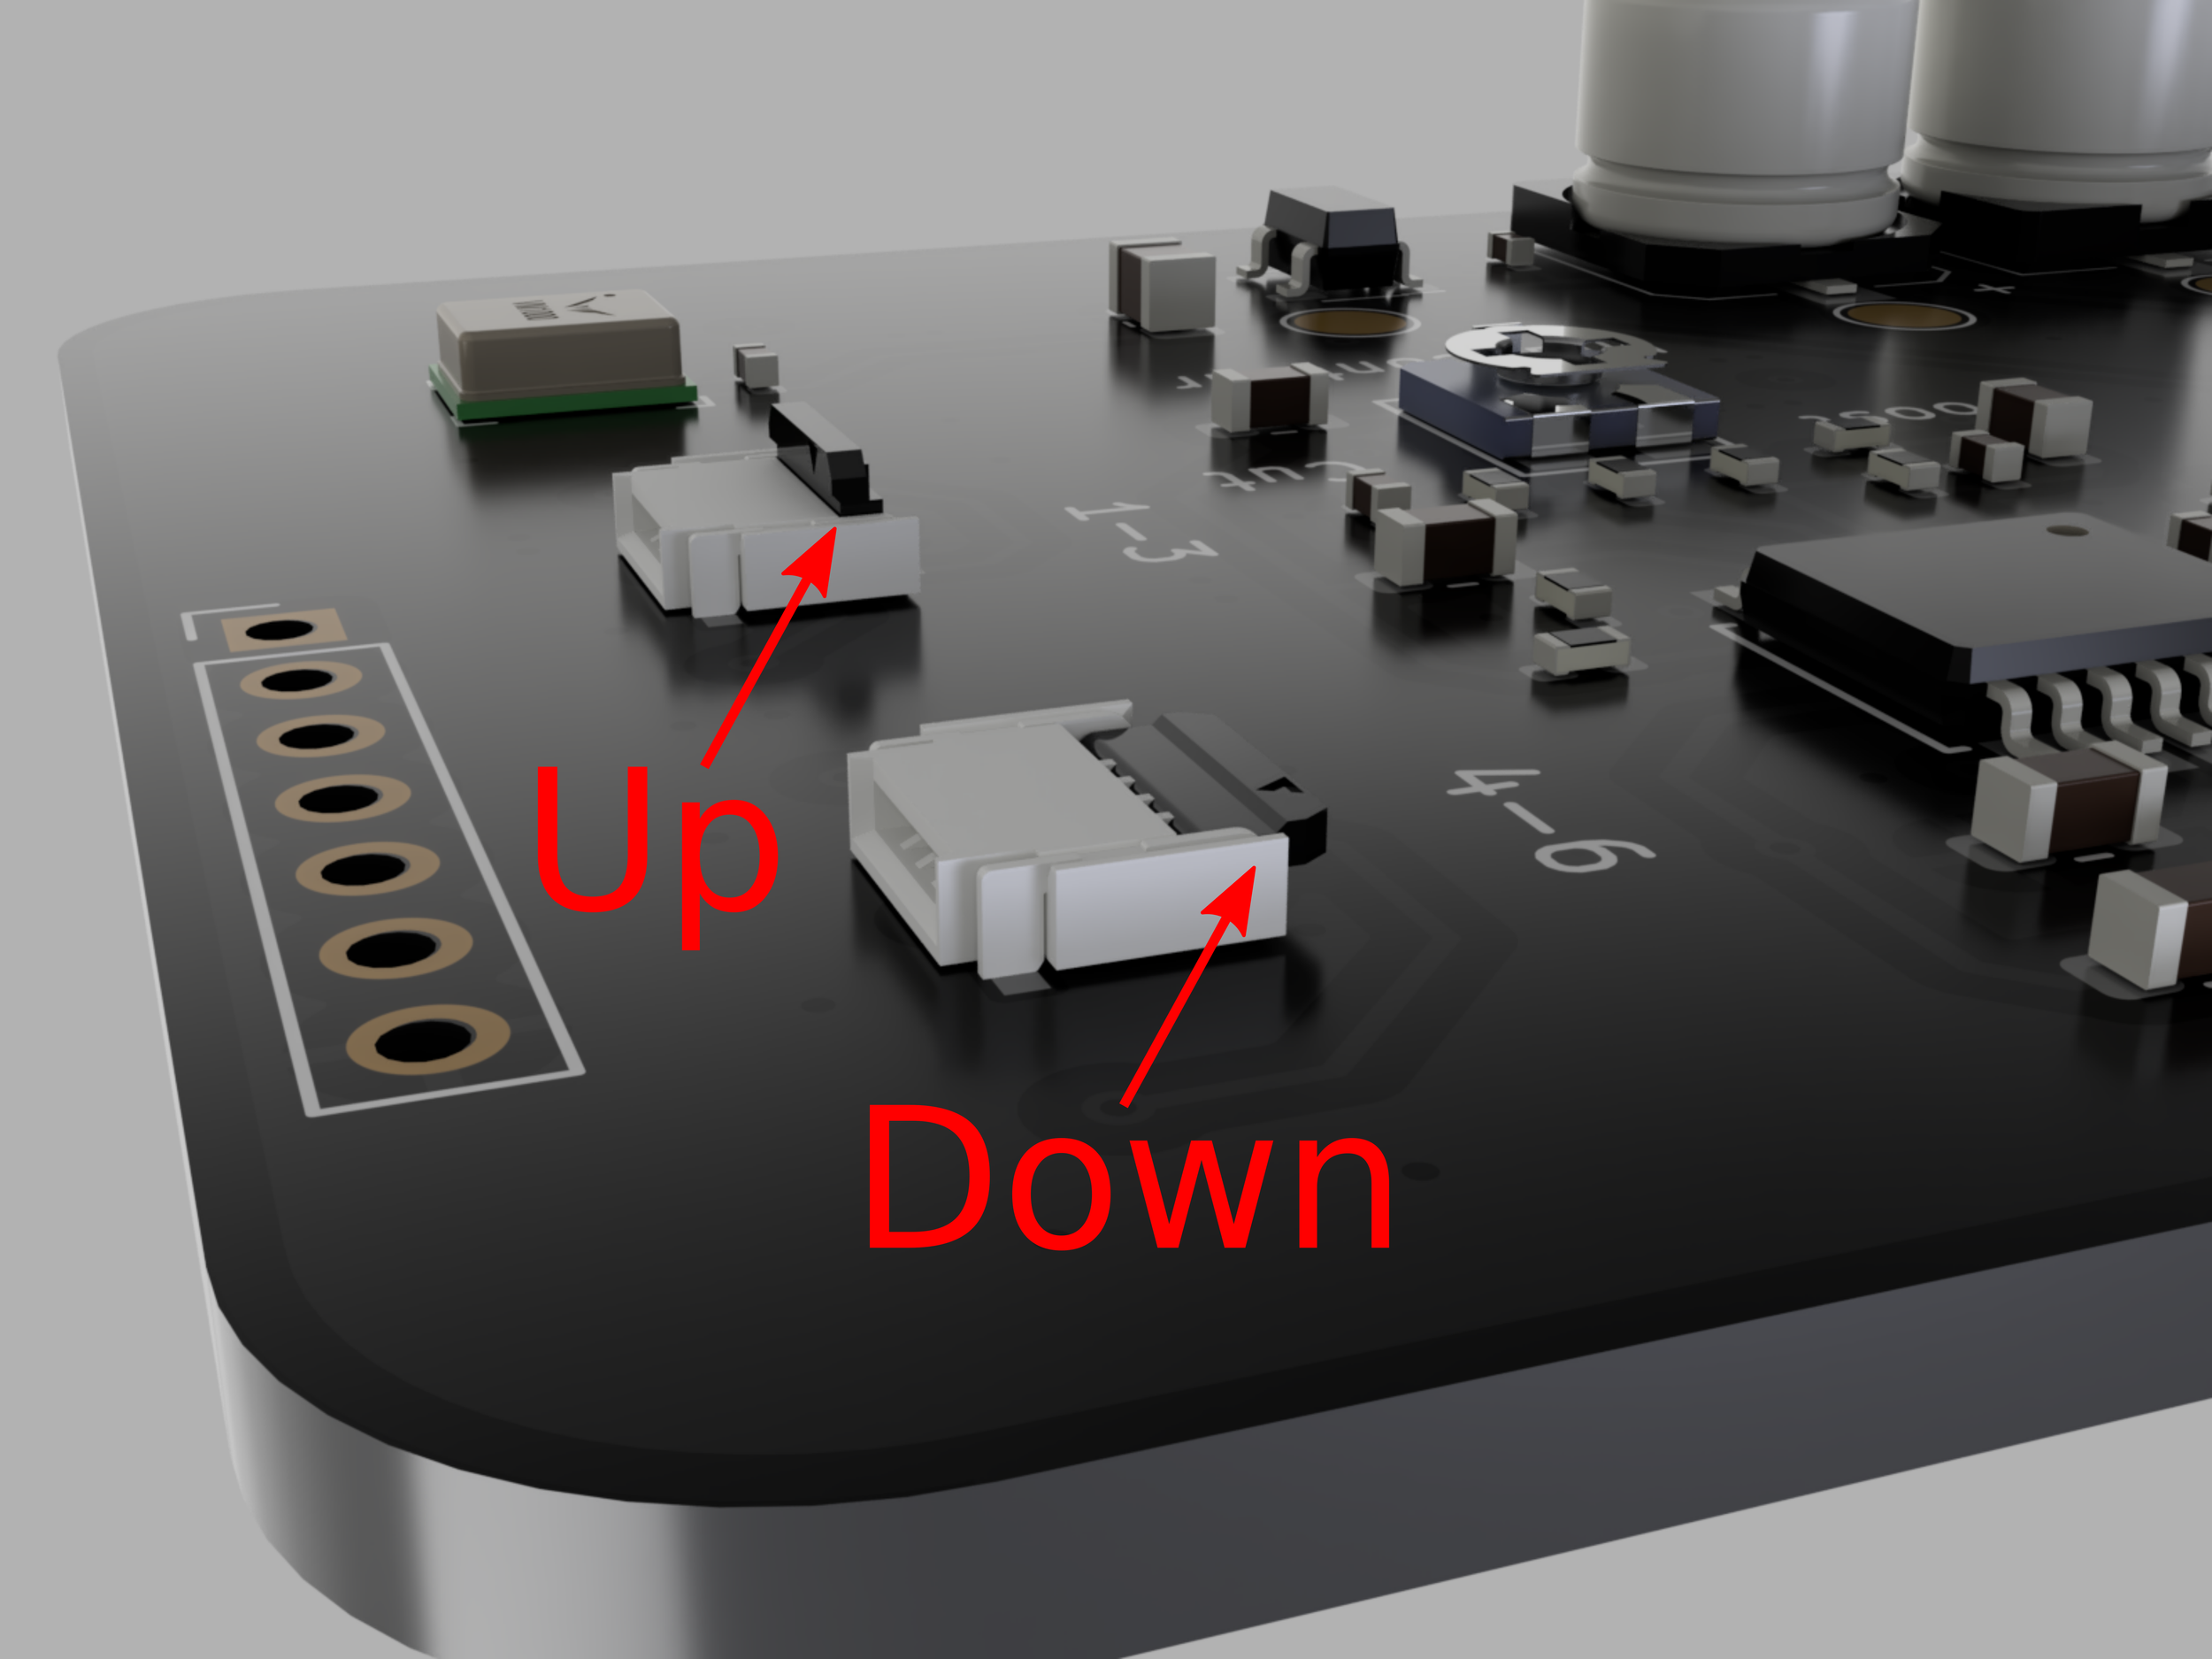
Connector Latch Positions
Make sure you understand the connector latch positions. The same connectors are used on both the Saddle-Pickup and the preamp.
Up: Make sure the connector latch is in this position when you are inserting or removing a cable.
Down: This position clamps down on the cable to hold it securely in the connector. Make sure to push the latches down after inserting the cable.

Inserting the
Pickup Cable
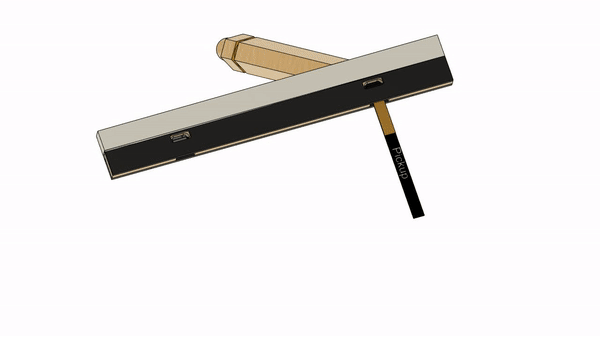
1. Ensure that the cable is oriented properly. The end labeled “Pickup” must plug into the connector on the pickup. The end labeled “Preamp” must plug into the connector on the preamp. The gold side of the cable end faces the access opening on the preamp and away from the circuit board on the preamp.
2. Ensure that the connector latch is in the open position.
3. Gently insert the cable end into the connector. Do Not force the cable if there is resistance. Gently wiggle the cable until it aligns into the connector. When it is properly aligned, it will require almost no force to insert it.
4. Gently close the latch on the connector.
5. Gently pull on the cable. It will not pull out if properly seated with the latch closed.
Removing the
Pickup Cable
1. Gently insert the small end of the supplied installation tool into the small access port behind the flip latch.
2. Gently push the tool further into the access port to push the flip latch open.
3. Gently pull the cable out of the bottom of the Saddle-Pickup.
Once you are sure that you understand how the connectors work, you can begin the action adjustment process.

Determine what action adjustments need to be made.
Dimension C (shown above) may be adjusted. This material is fiberglass, so make sure to wear a mask.
A rule of thumb is that the Saddle-Pickup needs be adjusted double the amount of the desired change of the action height at the 12th fret. For example, to adjust the action height .5mm, you need to adjust the Saddle-Pickup 1mm.
Remove the guitar strings.
CAREFULLY reach inside and feel that there is slack in the cables going to the Saddle-Pickup.
CAREFULLY, pull the Saddle-Pickup up out of the bridge. Make sure not to pinch or snag the cables.
Disconnect the cables as shown above. Make sure the cables do not fall through the bridge.
Make the necessary changes to the Saddle-Pickup.
Connect the cables as shown above.
CAREFULLY, seat the Saddle-Pickup back into the bridge making sure the cables are not pinched.
Restring the guitar.